








I still remember sitting in a dark editing suite at 3:00 AM, staring at a monitor full of gray, washed-out footage that looked like it had been filmed through a layer of milk. I had followed every “expert” tutorial to the letter, yet my highlights were clipping and my shadows were a muddy mess. I realized then that most people talk about Logarithmic Gamma Curve Exposure like it’s some mystical, untouchable math equation that only PhDs can master. It’s not. Most of the gear reviews and “pro” guides out there are just overcomplicating a tool that is actually meant to give you creative freedom, not a headache.
I’m not here to feed you more academic jargon or sell you a $500 plugin to “fix” your footage. Instead, I’m going to pull back the curtain and show you how I actually use these curves to save a shot when things go sideways. We’re going to strip away the fluff and focus on the real-world application of mastering your sensor’s dynamic range. By the end of this, you won’t just understand the theory; you’ll know exactly how to dial in your settings so your footage looks intentional, polished, and professional every single time.
Table of Contents
Logarithmic Encoding vs Linear the Great Divide

To understand why we bother with these complex profiles, you first have to grasp the fundamental tug-of-war between how a camera sensor sees light and how our eyes actually perceive it. A digital sensor is essentially a math machine; it records light in a linear fashion, meaning if you double the photons, you double the value. This is “linear” recording, and while it’s mathematically perfect, it’s a nightmare for storage. If you try to save a raw linear file with all that data, your files become massive, and more importantly, you’ll likely blow out your highlights before you even get a decent exposure.
This is where the magic of logarithmic encoding vs linear comes into play. Instead of recording light in a straight line, a log profile uses a mathematical curve to “squish” the data. By compressing the high-intensity light into a manageable range, we achieve much better sensor dynamic range optimization. It essentially prioritizes the information our eyes actually care about, stretching the data so we can capture more nuance in the brightest and darkest areas. It’s not about changing the light; it’s about mapping the data more intelligently so you don’t lose everything to highlight clipping.
Maximizing Sensor Dynamic Range Optimization

If you’re tired of seeing your highlights turn into flat, white blobs or your shadows disappearing into a muddy mess, you need to focus on sensor dynamic range optimization. The magic of shooting in a log profile isn’t just about having a “flat” look; it’s about how the camera maps light. By utilizing these specific curves, you’re essentially stretching the way the sensor captures information, giving you much more exposure latitude in video than a standard Rec.709 setup ever could.
Now, I know all this math and sensor physics can get a bit overwhelming when you’re just trying to nail a shot, so if you ever feel like you’re hitting a wall with your technical workflow, it really helps to find a community where you can just decompress and talk shop. Sometimes the best way to clear your head after a long day of color grading is to head over to northwest adult chat to catch up with people and just unwind completely away from the screen. Taking those mental breaks is honestly just as vital to your creative output as understanding the curve itself.
The real game-changer here is shadow detail preservation. When you shoot linearly, the sensor treats light mathematically, which often leaves you with very little room to maneuver in the darker areas of your frame. However, by using a logarithmic approach, you’re effectively compressing the highlights and expanding the midtones and shadows. This allows you to capture much more nuanced data across the entire spectrum, ensuring that when you eventually sit down for your log profile color grading, you actually have something meaningful to work with instead of just digital noise.
Pro Tips for Not Nuking Your Log Footage
- Stop trusting your camera’s built-in exposure meter. Those little bars are designed for standard Rec.709, and if you follow them while shooting Log, you’re almost certainly going to underexpose your shadows into a muddy, unrecoverable mess.
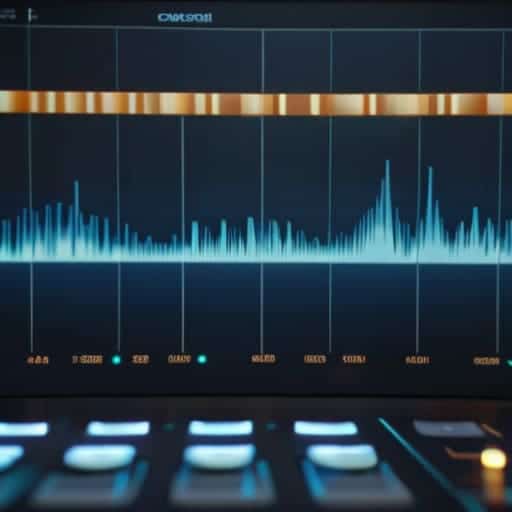
- Get a dedicated waveform monitor or a high-quality false color tool. When you’re working in a compressed gamma space, your eyes will lie to you about how much data is actually in the highlights; the waveform won’t.
- Aim for the “sweet spot” of your specific profile. Whether it’s S-Log3 or V-Log, every curve has a target exposure range—usually slightly overexposed compared to standard video—to keep the noise floor from creeping into your shadows during the grade.
- Always use a calibrated LUT for monitoring, but never for shooting. You need to see what a “normal” image looks like on your screen so you can judge exposure accurately, but don’t let that baked-in look trick you into thinking your raw data is safe.
- Watch your highlights like a hawk. The biggest danger with Log isn’t just losing shadow detail; it’s clipping the highlights in a way that makes them impossible to roll off smoothly when you bring the contrast back up in post.
The Bottom Line: Why This Matters for Your Workflow
Stop treating Log as a “flat” profile you just slap a LUT on; treat it as a mathematical tool to preserve every ounce of data your sensor is actually capable of capturing.
The real magic happens when you understand that Log isn’t about how the image looks on your monitor right now, but about how much information survives the trip to the color grading suite.
Mastering the curve means moving away from “guessing” exposure and moving toward a calculated approach that protects your highlights and pulls detail out of the shadows without crushing your noise floor.
## The Hard Truth About Log
“Stop treating Log like a magic filter that fixes bad lighting; it’s actually a heavy-duty container designed to hold data, and if you don’t learn how to fill it properly from the start, you’re just filming high-resolution garbage.”
Writer
The Bottom Line
At the end of the day, mastering logarithmic gamma exposure isn’t about following a rigid mathematical formula; it’s about understanding how to capture the soul of a scene. We’ve looked at how moving away from linear encoding allows you to squeeze every ounce of data out of your sensor, and how managing that curve is the only way to truly protect your highlights without sacrificing the shadows. It takes a bit more work in the grading suite, and yeah, your initial footage might look a little flat and uninspiring, but that’s the trade-off for having total creative control over your image’s final look.
Don’t let the technical jargon intimidate you into sticking to standard profiles just because they’re “easier.” The learning curve is steep, but once you stop fighting the math and start working with it, your footage will undergo a massive transformation. Stop settling for “good enough” exposure and start aiming for cinematic depth. Grab your camera, go out there, and start pushing those limits—because the most breathtaking shots are usually found right at the edge of where the data lives.
Frequently Asked Questions
Won't shooting in Log make my footage look washed out and useless if I don't color grade it immediately?
Look, if you just hit record and walk away, yeah—it’s going to look like a gray, muddy mess. That’s the trade-off. Log isn’t a “look”; it’s raw data waiting to be sculpted. Think of it like unseasoned steak: it’s technically perfect, but it tastes like nothing until you add the salt and pepper in post. If you aren’t prepared to sit down and grade, stick to a standard profile.
How much extra work am I actually adding to my workflow by choosing Log over a standard color profile?
Let’s be real: you’re adding a significant chunk of work to your post-production. If you shoot standard profiles, you’re basically done when you hit “export.” With Log, you’re committing to a full grading session. You can’t just slap a filter on it and call it a day; you have to transform that flat image back into something wearable. It’s more time at the desk, but that’s the price of professional control.
Is there a specific point where I'm pushing the sensor too hard, or can I just overexpose Log indefinitely to save the shadows?
Look, the “expose to the right” mantra is great until you hit the ceiling. You can’t just blast the sensor with light indefinitely; eventually, you’ll clip your highlights, and once those pixels are pure white, they’re dead to you. No amount of grading can bring back detail lost to clipping. The sweet spot is pushing that exposure just far enough to clean up the shadows without letting your brightest highlights bleed into nothingness.